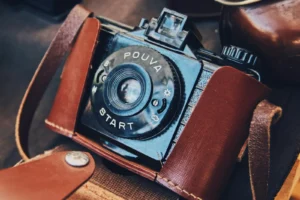
Introduction to Camera Hacks
In the world of photography, mastering the art and science of capturing stunning images involves more than just an eye for composition or the right subject matter. It also requires a deep understanding of your camera’s capabilities and the willingness to experiment with various techniques. Camera hacks refer to simple tweaks, creative ideas, and unconventional approaches that can enhance photography significantly. By employing these hacks, photographers of all skill levels can unlock the full potential of their equipment and achieve professional-quality results.
One of the primary advantages of employing camera hacks is that they do not necessarily require expensive gear or advanced technical knowledge. Instead, many of these techniques can be accomplished with a basic understanding of your camera’s functions, allowing photographers to achieve remarkable outcomes through ingenuity rather than investment. For instance, manipulating settings such as exposure, ISO, and shutter speed can significantly affect the final image without requiring the latest model or expensive lenses.
Additionally, camera hacks can foster creative thinking and allow photographers to explore new styles and techniques. Whether it is utilizing natural light to create ethereal landscapes or leveraging everyday objects as makeshift filters for unique effects, the possibilities are nearly limitless. These innovations encourage photographers to experiment and grow in their craft, leading to an expanded portfolio characterized by striking and memorable images.
In essence, by adopting camera hacks, photographers can elevate their work while enhancing their familiarity with their equipment. The ability to make small but impactful adjustments can mean the difference between an ordinary snapshot and a captivating photograph that tells a story. Through a balanced amalgamation of creativity and technical application, camera hacks can truly transform the photography experience.
Using Manual Settings Effectively
Utilizing manual settings on your camera can significantly enhance your photography skills, offering greater control over the final composition of your images. The three primary settings to focus on are aperture, shutter speed, and ISO, each playing a crucial role in determining the exposure and overall quality of your photographs.
Aperture is the opening in your lens that allows light to enter the camera. It is measured in f-stops, such as f/2.8, f/4, or f/8. A lower f-stop number indicates a larger aperture, allowing more light in and creating a shallow depth of field. This effect can be stunning for portraits as it blurs the background, drawing attention to the subject. Conversely, a higher f-stop results in a smaller aperture, leading to greater depth of field ideal for landscape photography, where sharpness throughout the image is desired.
Shutter speed determines how long your camera’s sensor is exposed to light. Measured in seconds or fractions of a second, a fast shutter speed (like 1/1000) freezes motion, making it perfect for capturing fast-moving subjects such as athletes or wildlife. In contrast, a slower shutter speed (like 1/2) allows for more light to hit the sensor, often used to create motion blur in water or to capture the trails of lights at night.
ISO represents the sensitivity of your camera’s sensor to light. A lower ISO setting (e.g., ISO 100) is suitable for bright conditions, producing minimal noise. Higher ISO settings (e.g., ISO 1600) are useful in darker environments but may introduce graininess into your photos. Understanding how these three settings interact allows photographers to make informed decisions, resulting in stunning images tailored to their creative vision.
DIY Camera Stabilizers
In the realm of photography and videography, achieving smooth and stable footage is paramount. Unwanted shakes and jitters can detract from the overall quality of a shot, making it imperative to consider stabilization methods. Fortunately, creating your own camera stabilizers can be an affordable and effective way to enhance your filming experience. By utilizing everyday items, you can easily construct devices that help minimize camera movement.
One popular method for building a DIY camera stabilizer involves using a handheld rig constructed from PVC pipes. To begin, gather materials such as PVC pipes, T-joints, and weights. Measure and cut a length of pipe to act as the base. Then, attach additional segments vertically to create a frame that allows a counterweight to hang below the camera. This helps to balance the camera and absorb any shocks from hand movements. With a bit of assembly, you will have a functional stabilizer that can greatly improve your footage quality.
Another simple stabilizer can be fashioned using a string tripod. This ingenious method involves tying a length of string to a camera with a small weight attached to the other end. Stand on a flat surface, hold the camera at eye level, and let the weight hang down until the string is taut. This setup encourages smoother movements as the weight absorbs any sudden shifts, allowing for a more stable shot when panning or tracking subjects.
Additionally, you can create a basic shoulder rig using materials like foam and fabric for added comfort. By placing the camera on your shoulder and utilizing straps and padding, your body can serve as a stabilizing mechanism when moving. This method is particularly useful for longer shoots, as it can reduce fatigue while enhancing the stability of your camera.
Implementing these DIY camera stabilizers can significantly enhance your photography skills. Whether you opt for a PVC rig, string tripod, or shoulder-mounted system, each offers a creative solution for achieving smoother, more professional-looking footage. In conclusion, taking the time to build your own stabilizers with simple materials allows photographers and videographers to capture stunning visual stories while preserving the quality of their imagery.
Using Natural Light to Your Advantage
Natural light is one of the most powerful tools in a photographer’s arsenal, as it can dramatically transform the mood and quality of an image. Understanding how to harness available light sources can lead to stunning photography that captures the essence of the subject. One of the prime opportunities for using natural light is during the golden hour, which occurs shortly after sunrise and just before sunset. During these periods, the sunlight is softer and warmer, casting a golden hue that enhances colors and reduces harsh shadows. Photographers are encouraged to schedule outdoor shoots within this time frame to take full advantage of the ambient light and achieve a more aesthetically pleasing result.
Another useful technique is the concept of backlighting. This involves positioning the subject in front of a light source, such as the sun, allowing it to illuminate the edges of the subject. This technique can create a halo effect, adding depth and dimension to images. It also provides an opportunity to capture striking silhouettes, where the subject is dark against a bright background, emphasizing shapes and forms over details. Experimenting with backlighting can yield unique perspectives that stand out in a portfolio.
Additionally, shadows can be creatively utilized to enhance photographic compositions. Shadows can add contrast and intrigue, directing the viewer’s gaze towards the subject. Photographers can look for interesting patterns or textures created by shadows, especially in urban environments or nature settings. Utilizing a combination of available light and shadows can result in visually compelling images that tell a story. By mastering the use of natural light and its various nuances, photographers can elevate their work and create stunning photography that resonates with viewers.
Creative Use of Props and Backgrounds
In the realm of photography, the significance of props and backgrounds is often underestimated. These elements play a crucial role in enhancing the depth, narrative, and overall composition of an image. Utilizing everyday objects allows photographers to craft unique visuals that engage the viewer, while simple backgrounds can drastically transform the aesthetic quality of photographs.
One effective strategy is to incorporate objects from the surrounding environment. Items such as books, flowers, or even kitchen utensils can serve as intriguing props that add character to a shot. The careful selection of colors, textures, and shapes aids in establishing a mood and theme that resonates with the intended message of the photograph. For instance, a vintage book can evoke nostalgia, while a bright flower can bring vitality and energy to a composition.
When it comes to backgrounds, simplicity is often key. A clean, uncluttered backdrop allows the subject to stand out while avoiding distractions. Consider utilizing plain walls, vast open fields, or even abstract designs. The purpose is to create visual harmony by ensuring the background complements the subject without overshadowing it. Additionally, experimenting with depth of field can provide further interest; blurring the background while keeping the subject in sharp focus emphasizes the main element of the photograph.
Another innovative approach is to manipulate everyday items in unique ways. For example, using colorful fabrics as backgrounds can add layers of texture and richness to an image. Similarly, strategic use of natural elements like leaves, stones, or water can lend a distinctive touch to the overall composition. Lighting also plays a pivotal role; adjusting the placement of props relative to the light source can dramatically alter the mood and enhance the visual narrative of the photograph.
Playing with Depth of Field
Depth of field (DoF) is a crucial element in photography that affects the viewer’s perception of an image. It refers to the range of distance within a photo that appears acceptably sharp and clear. Manipulating depth of field allows photographers to isolate subjects or enhance bokeh effects, leading to stunning and engaging compositions. Understanding how to control depth of field can significantly elevate the quality of your photography.
One primary factor influencing depth of field is the aperture setting. A wider aperture (represented by a smaller f-number, such as f/1.8) creates a shallow depth of field, which, in turn, focuses attention on the subject while blurring the background. This technique is particularly effective in portraiture, where the subject stands out against a soft, dreamy backdrop. Conversely, a narrower aperture (a larger f-number, such as f/16) results in a deeper depth of field, useful for landscape photography where both the foreground and background need to be sharp.
Lens choice also plays a significant role in achieving the desired depth of field. Prime lenses, especially those with larger maximum apertures, are excellent for creating that coveted bokeh effect due to their ability to produce a shallow depth of field. On the other hand, wide-angle lenses tend to provide a greater depth of field at any given aperture, making them ideal for capturing expansive scenes.
Another effective technique for manipulating depth of field is to adjust the distance between the camera, the subject, and the background. Getting closer to the subject can enhance the separation, resulting in a more pronounced bokeh effect. Additionally, utilizing different focal lengths can also affect depth of field, enabling creative possibilities that enhance the image’s storytelling. By incorporating these techniques, photographers can achieve striking aesthetics, isolating subjects and delighting viewers with beautiful and compelling compositions.
Experimenting with Different Angles and Perspectives
Photography is an art that thrives on creativity and imagination. One of the most effective ways to enhance your photography skills is by experimenting with different angles and perspectives. Conventional shooting angles often lead to predictable images, but breaking free from these norms can yield breathtaking results. By changing your viewpoint, you can completely alter the narrative and emotional impact of your photos.
Shooting from a high vantage point can offer a unique overview of the scene. For instance, capturing a bustling cityscape from a rooftop allows you to depict the scale and connectivity of the urban environment. Conversely, photographing a subject from a low angle creates an empowering effect, emphasizing its stature and significance. Whether you are shooting a towering building or a small flower, altering your position can lead to striking compositions that engage viewers differently.
Beyond traditional angles, consider adopting unusual perspectives. For example, shooting through objects, like leaves or windows, adds depth and context to your images. This technique invites viewers to experience the photo from an interactive standpoint, allowing them to feel immersed within the composition. Additionally, utilizing reflections in water or glass can introduce intriguing layers, further enhancing visual interest.
Another method includes experimenting with changing your distance from the subject. Close-ups can highlight intricate details that may go unnoticed from a distance, while wide-angle shots provide context and setting. Each perspective offers unique storytelling potential, inviting viewers to explore the narrative you have captured. Therefore, as you embark on your photographic journey, remember that embracing a variety of angles and perspectives can significantly elevate the quality and impact of your images.
Editing Hacks for Better Photos
Editing is an integral part of photography that significantly enhances the quality and appeal of images. Whether you are utilizing professional software like Adobe Photoshop or simpler apps such as Snapseed, there are several editing hacks that can elevate your photos from ordinary to extraordinary. One of the most straightforward techniques is cropping. Cropping allows you to focus on the subject by eliminating distractions from the periphery. It can also help adjust the composition, following the rule of thirds for a more balanced photograph.
Another crucial editing technique is color correction. Often, the colors in a photo may not represent reality due to lighting conditions or camera settings. By utilizing tools for adjusting brightness, contrast, saturation, and exposure, you can create a more vibrant image. Most editing software features automatic color correction options that can serve as a great starting point before making additional manual adjustments.
Filters play a significant role in enhancing the mood of your photographs. They can add warmth, coolness, or a specific character to the image, allowing you to create a consistent style throughout your portfolio. Many apps provide a variety of pre-set filters, and, while applying them can be tempting, it is essential to use them judiciously to prevent the image from appearing overly processed.
Furthermore, utilizing advanced features such as layering and masking can also enhance the edit. These techniques enable you to apply effects selectively to certain areas of a photo without affecting the entire image, allowing for a nuanced approach to editing. By incorporating these editing hacks into your workflow, you not only improve the look of your photographs but also develop a unique style that reflects your artistic vision.
Conclusion and Final Thoughts
Throughout this blog post, we have explored various camera hacks that can significantly enhance your photography skills. Each of these hacks presents unique techniques and creative approaches that can help you achieve stunning images, regardless of your experience level. From adjusting your camera settings for optimal exposure to utilizing natural light effectively, these tricks provide a toolbox for photographers looking to elevate their work.
One of the most important takeaways is the power of experimentation. Photography is both an art and a science, and by trying out different techniques, you will find what works best for your style. Whether it’s learning the benefits of shooting during the golden hour or employing unconventional angles, these hacks serve as a starting point. Don’t hesitate to modify and adapt these suggestions to fit your specific needs; your creativity should guide your photography journey.
Moreover, using these camera hacks can lead to unexpected results, fostering a deeper appreciation for the artistry of photography. Each click of the shutter presents an opportunity to capture the world uniquely. As you apply these strategies, consider how they influence your perspective on composition, lighting, and storytelling. Over time, as you refine these techniques, your photographic eye will sharpen, allowing you to capture moments that resonate with both beauty and emotion.
In conclusion, embracing the creative possibilities that accompany these camera hacks can transform your photography experience. As you venture into new methods and break traditional boundaries, remember that practice and patience are key. By continually refining your skills and exploring different aspects of photography, you will undoubtedly enhance your ability to capture stunning images that reflect your unique vision.


